Easy Homemade Cheez-Its You’ll Love
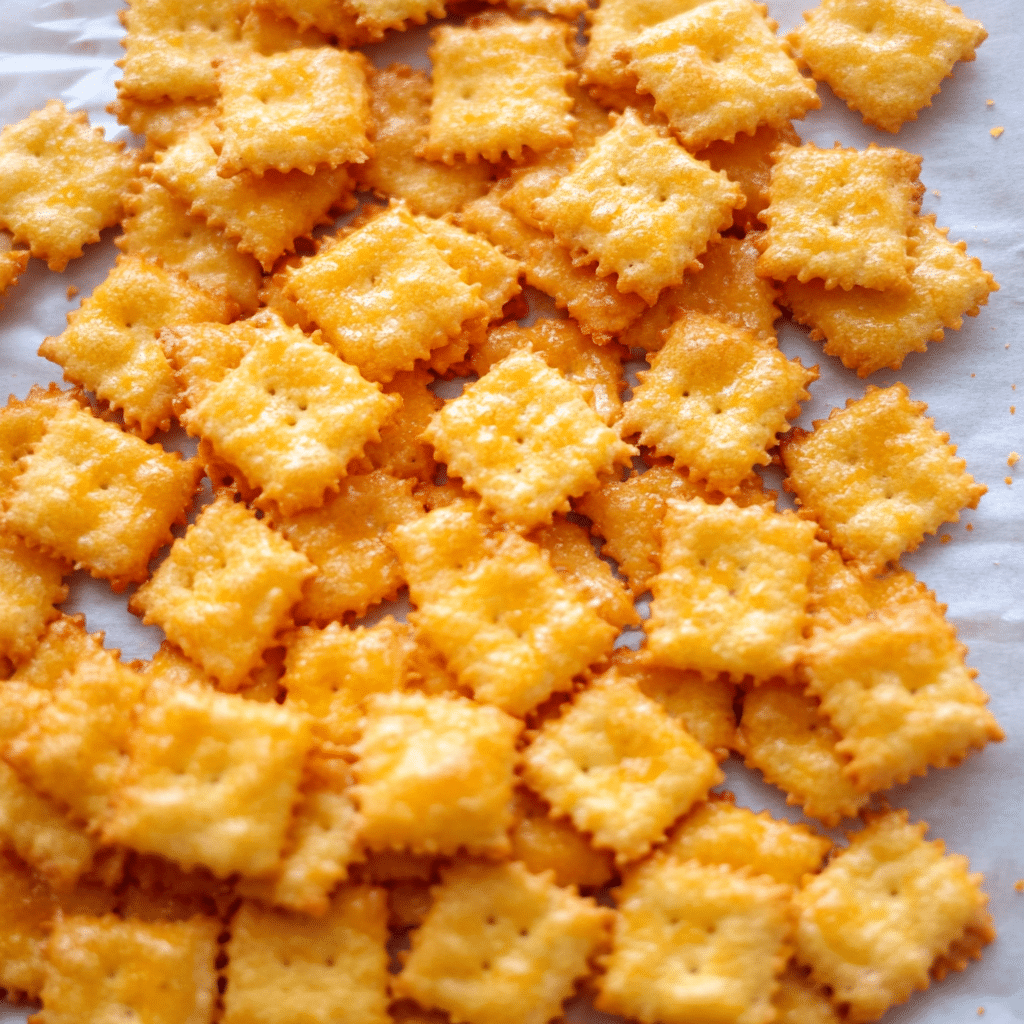
If you’re craving a snack that’s crispy, cheesy, and totally addictive, you’ll adore these Homemade Cheez-Its. This recipe shows you how to make those perfectly baked, golden squares in your own kitchen, with simple ingredients that come together quickly. Whether for a casual nibble or packing in lunchboxes, these Homemade Cheez-Its are the snack upgrade you’ve been waiting for—full of flavor and free from mystery additives.
Why You’ll Love This Recipe
- Simple ingredients: Easily found staples come together for an irresistible result.
- Customizable flavor: Adjust the cheese and seasoning to match your taste buds perfectly.
- Crunchy texture: Achieves that iconic crisp bite every crunchy snack lover craves.
- Homemade freshness: Baking from scratch means no preservatives or fillers.
- Fun and fast: Quick prep and bake time make it perfect for last-minute snacking.
Ingredients You’ll Need
This recipe uses basic ingredients that combine crucial roles in texture, flavor, and color, making your Homemade Cheez-Its pop with cheesy goodness and crunch.
- Sharp Cheddar Cheese: Key for that unmistakably rich, tangy cheese flavor.
- All-Purpose Flour: Forms the base and structure for the perfect crunch.
- Butter: Adds flakiness and helps the crackers bake evenly.
- Cold Water: Just enough to bring the dough together without being sticky.
- Salt: Enhances the savory goodness and balances the sharpness of the cheese.
- Paprika or Cayenne Pepper (optional): Provides a slight kick for those who love a bit of spice.
Variations for Homemade Cheez-Its
One of the best things about Homemade Cheez-Its is how easily you can tweak the flavors or ingredients to suit different cravings or dietary needs. Here are some fun ways to mix things up!
- Extra cheesiness: Swap sharp cheddar for a blend of cheddar and parmesan for a deeper flavor.
- Gluten-free option: Use a gluten-free flour blend to keep the crunch without gluten.
- Herb-infused: Add dried rosemary or thyme to the dough for an aromatic twist.
- Spicy touch: Incorporate chili flakes or smoked paprika to boost the heat.
- Vegan version: Substitute butter with vegan margarine and use nutritional yeast in place of cheese.

How to Make Homemade Cheez-Its
Step 1: Prepare the Dough
Start by grating your sharp cheddar cheese finely. In a mixing bowl, combine the cheese with all-purpose flour, salt, and optional spices, then cut in the cold butter until the mixture resembles coarse crumbs. Add cold water little by little, kneading gently to bring the dough together without overworking it.
Step 2: Roll and Cut
Place dough between two sheets of parchment paper and roll it out into a thin, uniform layer about 1/8 inch thick. Using a sharp knife or pizza cutter, trim edges and cut into small squares approximately 1-inch wide. For that classic Cheez-It look, prick each square with a fork or toothpick.
Step 3: Bake to Perfection
Transfer the squares to a parchment-lined baking sheet, spacing them slightly apart. Bake in a preheated oven at 350°F (175°C) for 12-15 minutes or until edges are golden and crackers feel crisp. Keep an eye on them toward the end to prevent burning.
Step 4: Cool and Store
Allow your Homemade Cheez-Its to cool completely on a wire rack, which helps maintain crispness. Once cooled, store in an airtight container at room temperature for up to a week or longer if refrigerated.
Pro Tips for Making Homemade Cheez-Its
- Cheese choice matters: Use freshly grated cheese for the best melt and flavor, avoiding pre-shredded versions with anti-caking agents.
- Thin rolling is key: Roll dough evenly thin to ensure crunchy, not doughy, crackers.
- Poke before baking: Pricking each square prevents puffing and keeps the classic flat shape.
- Don’t overcrowd the pan: Leave space for heat circulation so crackers crisp uniformly.
- Cool completely: Crispness develops as crackers cool; don’t store them while still warm.
How to Serve Homemade Cheez-Its
Garnishes
Sprinkle a tiny pinch of flaky sea salt right after baking or a touch of smoked paprika for extra flavor. Fresh herbs, finely chopped chives, or a tiny dusting of black pepper can elevate their appearance and taste.
Side Dishes
Pair these Homemade Cheez-Its with creamy dips like ranch, guacamole, or cheesy spinach dip for a fun snack spread. They also complement soups and salads beautifully, adding a delightful crunch and boost of flavor.
Creative Ways to Present
Serve your Homemade Cheez-Its in small rustic bowls or cardboard cones for easy snacking at parties. You could also layer them with cheese cubes, olives, and cherry tomatoes on a charcuterie board for an irresistible appetizer.
Make Ahead and Storage
Storing Leftovers
Keep your Homemade Cheez-Its fresh by storing them in an airtight container at room temperature for up to one week. Proper sealing preserves their crunch and flavor while preventing them from absorbing humidity.
Freezing
You can freeze Homemade Cheez-Its in a zip-top freezer bag for up to three months. Just thaw at room temperature before serving to enjoy them as if freshly baked.
Reheating
If your Homemade Cheez-Its lose their crunch after storage, pop them in a warm oven at 300°F (150°C) for a few minutes to restore crispiness without drying out.
FAQs
Can I make Homemade Cheez-Its without cheese?
The signature flavor depends on cheese, especially sharp cheddar, so skipping it would dramatically change the taste and texture. However, vegan cheese alternatives can work for dairy-free versions.
How thin should I roll the dough?
Around 1/8 inch thick is ideal. This ensures the crackers bake evenly and achieve that perfect crunchy texture without burning.
What is the best way to store Homemade Cheez-Its?
Store them in an airtight container at room temperature to keep them crispy, and avoid humid places which can make them soft.
Can I add other flavors to this Homemade Cheez-Its recipe?
Absolutely! Incorporate spices such as garlic powder, cayenne, or herbs to create unique flavor profiles that match your preferences.
How long do Homemade Cheez-Its last?
When stored properly, they stay fresh and crunchy for about one week, but freezing can extend their shelf life up to three months.
Final Thoughts
Making your own Homemade Cheez-Its is such a rewarding and tasty project—full of cheesy goodness and crisp satisfaction. With just a handful of ingredients and a bit of love, you’ll be sharing this snack favorite with everyone you know. Try this recipe and watch how quickly these irresistible bites disappear from the bowl!
PrintHomemade Cheez-Its
Crispy, cheesy, and addictive homemade Cheez-Its made with sharp cheddar, simple ingredients, and baked to golden perfection. A customizable, preservative-free snack perfect for nibbling, lunchboxes, or parties.
- Prep Time: 15 minutes
- Cook Time: 12-15 minutes
- Total Time: 30 minutes
- Yield: About 48 crackers 1x
- Category: Appetizers
- Method: Baking
- Cuisine: American
- Diet: Vegetarian
Ingredients
Main Ingredients
- 1 cup Sharp Cheddar Cheese, finely grated
- 1 cup All-Purpose Flour
- 1/2 cup (1 stick) Butter, cold and cut into small pieces
- 2–3 tablespoons Cold Water
- 1/2 teaspoon Salt
- 1/4 teaspoon Paprika or Cayenne Pepper (optional)
Instructions
- Prepare the Dough: Start by finely grating the sharp cheddar cheese. In a mixing bowl, combine the cheese with all-purpose flour, salt, and optional spices. Cut in the cold butter using a pastry blender or your hands until the mixture resembles coarse crumbs. Add cold water gradually, kneading gently just until the dough comes together without becoming sticky.
- Roll and Cut: Place the dough between two sheets of parchment paper and roll it out evenly to about 1/8 inch thickness. Trim the edges for uniformity and cut into 1-inch squares using a sharp knife or pizza cutter. Prick each square with a fork or toothpick to prevent puffing while baking.
- Bake to Perfection: Arrange the squares on a parchment-lined baking sheet, spacing them slightly apart to allow heat circulation. Bake in a preheated oven at 350°F (175°C) for 12-15 minutes, or until the edges turn golden and the crackers feel crisp. Watch carefully near the end to avoid burning.
- Cool and Store: Transfer the baked Cheez-Its to a wire rack and let them cool completely to develop maximum crispness. Once cooled, store in an airtight container at room temperature for up to one week, or refrigerate for longer freshness.
Notes
- Use freshly grated cheese for better flavor and melt; avoid pre-shredded cheese with anti-caking agents.
- Roll dough thin and even at about 1/8 inch thickness for optimal crunch.
- Prick each cracker before baking to keep them flat and prevent puffing.
- Do not overcrowd the baking sheet; allow space for proper heat circulation.
- Cool completely before storing to maintain crispness.
Nutrition
- Serving Size: 10 crackers (approx. 28g)
- Calories: 150
- Sugar: 0.3g
- Sodium: 180mg
- Fat: 11g
- Saturated Fat: 7g
- Unsaturated Fat: 3.5g
- Trans Fat: 0g
- Carbohydrates: 9g
- Fiber: 0.3g
- Protein: 4g
- Cholesterol: 30mg
Keywords: homemade Cheez-Its, cheesy crackers, baked snacks, sharp cheddar crackers, crunchy snack