How to Make Cherries in the Snow Dessert Easily

If you’ve been hunting for a dessert that’s both elegant and surprisingly simple, you’re in for a treat with the Cherries in the Snow Dessert. This delightful dish layers vibrant cherries against a soft, creamy background, creating a perfect balance of sweet and tart flavors that feel like a celebration in every bite. Whether you’re planning a casual get-together or looking to impress at a holiday party, this recipe for Cherries in the Snow Dessert is easy to make and sure to become a favorite.
Why You’ll Love This Recipe
- Effortless elegance: Combines simple ingredients into a dish that looks and tastes gourmet without the fuss.
- Refreshing balance: The tartness of cherries paired with creamy textures makes for a perfectly balanced dessert.
- Versatile for occasions: Works beautifully for casual family dinners, festive events, or even a romantic night in.
- Make-ahead friendly: Can be prepared in advance, saving you time and stress on the day of your gathering.
- Customizable flavors: Easy to tweak with different fruits, nuts, or cream variations depending on your mood or what’s in your pantry.
Ingredients You’ll Need
The magic of Cherries in the Snow Dessert lies in its simplicity, which means focusing on fresh, high-quality ingredients that bring out the best flavor and texture. Each component plays a vital role, from the tart cherries adding brightness to the creamy layers that bring softness and sweetness.
- Fresh cherries: Use pitted, ripe cherries for a juicy and flavorful base that delivers that signature tang.
- Whipped cream: Light and airy, it forms the snowy “blanket” that softens the tartness of the fruit.
- Cream cheese or mascarpone: Adds a rich, velvety texture and slight tang to complement the cherries.
- Sugar: Balances the tartness and sweetens the cream layers just right.
- Vanilla extract: A hint of vanilla deepens the dessert’s flavor complexity.
- Butter: For layering or creating a light crust if desired.
- Optional nuts or coconut flakes: Adds an enjoyable crunch and contrast.
Variations for Cherries in the Snow Dessert
The Cherries in the Snow Dessert is like a blank canvas that’s easy to personalize. Whether you want to add a twist to the texture or cater to specific dietary preferences, this dessert adapts beautifully with simple swaps or additions.
- Frozen berries mix: Substitute cherries with a mix of frozen berries for a seasonal twist that stays fresh year-round.
- Dairy-free version: Use coconut cream and vegan cream cheese alternatives to keep it creamy but allergy-friendly.
- Chocolate drizzle: Add a bit of melted dark chocolate on top for a decadent touch.
- Nut topping: Toasted almonds or pecans sprinkled on top add crunch and extra flavor dimension.
- Gluten-free crust: Create a crust from almond flour and butter to give the dessert a foundation while keeping it gluten-free.

How to Make Cherries in the Snow Dessert
Step 1: Prepare the cherries
Start by washing and pitting fresh cherries, or use frozen cherries thawed and drained if fresh aren’t available. Toss them lightly with a bit of sugar and a splash of lemon juice to amplify their natural brightness and draw out a little juice to infuse throughout the dessert.
Step 2: Whip the cream mixture
In a chilled bowl, whip heavy cream until soft peaks form. Gently fold in softened cream cheese or mascarpone along with sugar and vanilla extract to create a smooth, luscious layer that will contrast nicely with the cherries.
Step 3: Assemble the layers
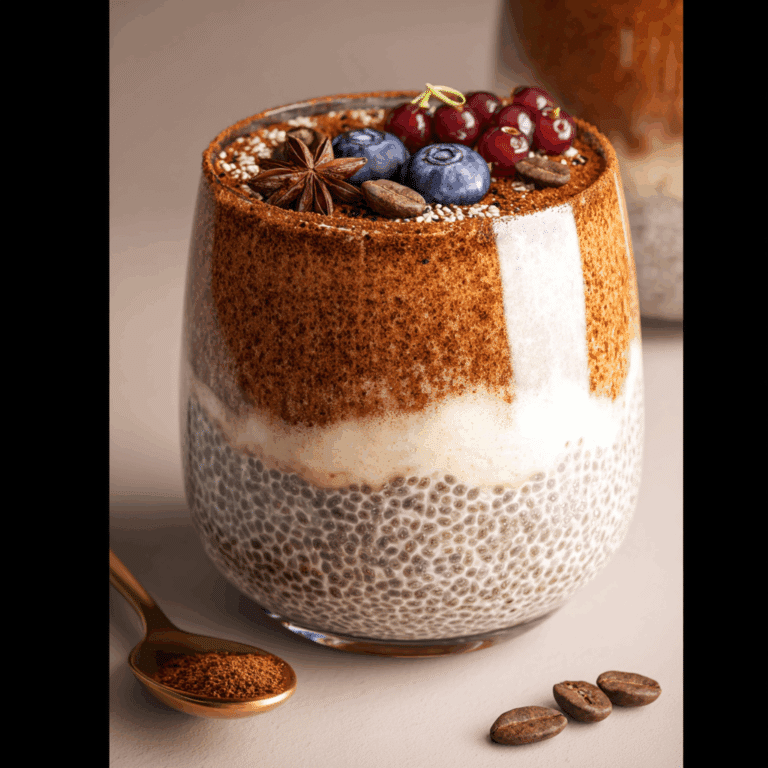
Choose a clear glass dish or individual cups to showcase the beautiful contrasting layers. Begin with a base of whipped cream mixture, then add a generous layer of the sugared cherries, followed by more cream mixture. Repeat until all components are used, ending with cream on top.
Step 4: Chill to set
Cover your dessert and place it in the refrigerator for at least 2 hours, allowing the flavors to meld and the layers to firm up slightly, creating that perfect “snowy” look and creamy texture.
Step 5: Add finishing touches
Just before serving, garnish your Cherries in the Snow Dessert with optional toasted nuts, a sprinkle of coconut flakes, or a drizzle of chocolate for extra flavor and an elegant touch.
Pro Tips for Making Cherries in the Snow Dessert
- Chill your mixing bowl: Keeping the bowl cold helps whip the cream faster and more efficiently.
- Don’t over-sweeten: The balance of tart cherries and sweet cream is key, so taste as you go to keep it just right.
- Use fresh cherries when possible: Fresh cherries bring a natural flavor and texture that frozen can’t fully replicate.
- Layer gently: Use a spatula to fold layers softly, preserving the light texture.
- Let flavors meld: The resting time in the fridge is crucial to turn this into a harmonious dessert.
How to Serve Cherries in the Snow Dessert
Garnishes
Garnishing is where this dessert shines visually. Fresh mint leaves add a burst of color and aroma, while toasted coconut flakes or chopped nuts provide an inviting crunch. A light dusting of powdered sugar can mimic the snowy theme beautifully.
Side Dishes
This dessert pairs wonderfully with light, complementary flavors like a cup of herbal tea or a scoop of vanilla bean ice cream. Fresh fruit salad or delicate coffee notes from an espresso also enhance the overall dessert experience.
Creative Ways to Present
Try serving the Cherries in the Snow Dessert in elegant glass parfait cups or mason jars for a rustic yet sophisticated look. Layering it in trifle bowls with transparent sides creates a colorful display that guests will love to admire before tasting.
Make Ahead and Storage
Storing Leftovers
If you have leftovers, store the dessert in an airtight container in the refrigerator. It will keep its texture and flavor for up to 3 days, making it perfect for preparing in advance or enjoying as a next-day treat.
Freezing
While this dessert is best fresh or chilled, you can freeze individual portions in sealed containers. Thaw overnight in the fridge before serving to retain most of the texture and flavor, although the cream’s texture may soften slightly.
Reheating
Since this is a chilled and creamy dessert, reheating isn’t recommended. However, you can let any frozen portions soften naturally in the fridge instead of using heat to maintain that perfect balance of textures.
FAQs
Can I use canned cherries instead of fresh?
Canned cherries can be used in a pinch, but fresh or frozen cherries are preferred to maintain the dessert’s natural tartness and texture.
Is there a vegan version of Cherries in the Snow Dessert?
Yes! Substitute coconut cream and vegan cream cheese alternatives to make this dessert both dairy-free and delicious.
How long does this dessert last in the fridge?
It stays fresh for about 3 days when covered properly to prevent it from absorbing fridge odors.
Can I prepare this dessert the day before serving?
Absolutely! Making it a day ahead lets the flavors meld and makes serving easier during your event.
What’s the best way to sweeten the cream?
Powdered sugar dissolves easily and is ideal for lightly sweetening whipped cream without any gritty texture.
Final Thoughts
Making the Cherries in the Snow Dessert is like creating a little magic with simple ingredients. Its refreshing flavor, smooth textures, and beautiful layers make it a dessert worth sharing whenever you want to impress yourself or your guests. So go ahead, give this easy and irresistible treat a try—your taste buds will thank you!
Related Posts
- Irresistible Chocolate Peanut Butter Dream Bars Recipe
- Why Dr. Pepper Brownies Are Irresistible Treats
- Why Lemon Rhubarb Loaf with Glaze Is Perfect for Dessert
Cherries in the Snow Dessert
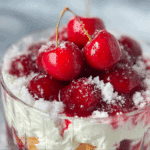
Cherries in the Snow Dessert is an elegant and simple layered dessert featuring fresh, tart cherries combined with a rich and creamy whipped mixture of cream cheese or mascarpone. This refreshing, versatile treat balances sweet and tart flavors perfectly and can be customized with nuts, coconut flakes, or chocolate. Ideal for casual get-togethers, festive occasions, or romantic evenings, it can be prepared ahead and served chilled for a stunning presentation.
- Prep Time: 20 minutes
- Cook Time: 0 minutes
- Total Time: 2 hours 20 minutes
- Yield: 4 servings 1x
- Category: Dessert
- Method: No Bake
- Cuisine: American
- Diet: Gluten Free
Ingredients
Main Ingredients
- 1 cup fresh ripe pitted cherries (or thawed frozen cherries, drained)
- 1 cup heavy whipping cream
- 4 oz cream cheese or mascarpone, softened
- 1/4 cup granulated sugar (plus extra for cherries)
- 1 teaspoon vanilla extract
- 1 teaspoon lemon juice (optional, for cherries)
- 1 tablespoon butter (optional, for crust or layering)
Optional Add-Ins and Garnishes
- Toasted nuts (almonds, pecans, or walnuts)
- Coconut flakes, toasted
- Dark chocolate, melted drizzle
- Almond flour (for gluten-free crust, if desired)
- Powdered sugar (for garnish)
Instructions
- Prepare the cherries: Wash and pit fresh cherries, or thaw and drain frozen cherries. Toss the cherries lightly with a little granulated sugar and a splash of lemon juice to enhance their natural brightness and release some juice to infuse through the dessert.
- Whip the cream mixture: Chill a mixing bowl and whip the heavy cream until soft peaks form. Gently fold in the softened cream cheese or mascarpone along with sugar and vanilla extract, mixing until smooth and luscious to create a creamy layer that complements the cherries.
- Assemble the layers: In clear glass dishes or individual cups, start with a base layer of the whipped cream mixture, add a generous layer of sugared cherries, then add more cream mixture. Repeat the layering until all ingredients are used, finishing with a layer of cream on top.
- Chill to set: Cover the assembled dessert and refrigerate for at least 2 hours to allow the flavors to meld and the layers to firm up, creating a snowy-white creamy texture.
- Add finishing touches: Just before serving, garnish with optional toasted nuts, coconut flakes, or a drizzle of melted dark chocolate to add flavor, texture, and elegance.
Notes
- Chill your mixing bowl to help whip cream efficiently.
- Do not over-sweeten; balance the tart cherries and sweet cream carefully by tasting as you go.
- Fresh cherries are preferred for best texture and flavor, but frozen cherries can be used if fresh are unavailable.
- Fold layers gently to maintain the light, airy texture.
- Letting the dessert rest in the fridge is essential for flavor melding and perfect consistency.
- Can be made a day ahead to save time and enhance flavor.
Nutrition
- Serving Size: 1 serving
- Calories: 250
- Sugar: 18g
- Sodium: 60mg
- Fat: 20g
- Saturated Fat: 12g
- Unsaturated Fat: 6g
- Trans Fat: 0g
- Carbohydrates: 12g
- Fiber: 1g
- Protein: 3g
- Cholesterol: 55mg
Keywords: cherries dessert, layered dessert, whipped cream dessert, gluten free dessert, make ahead dessert, easy elegant dessert