Cherry Layer Cake with Cherry Cream Cheese Frosting
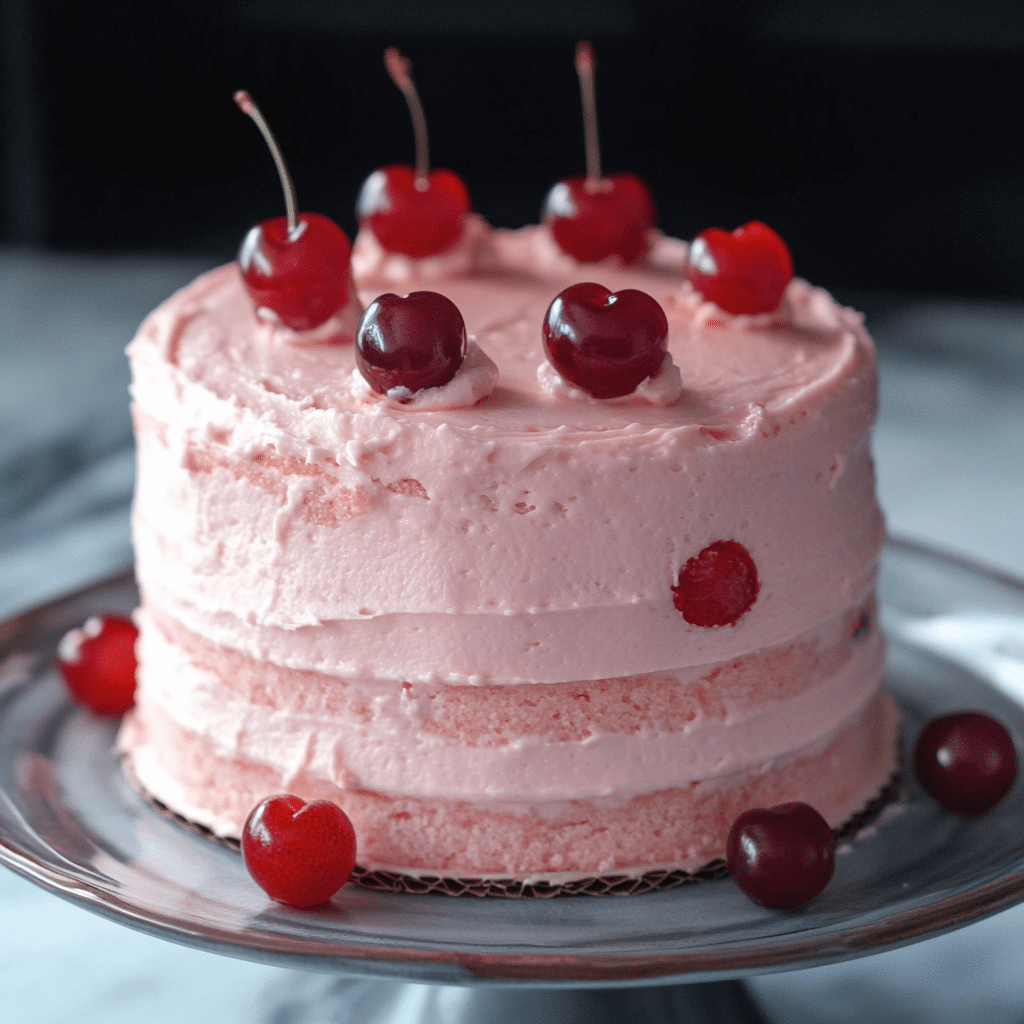
If you are craving a dessert that captures the perfect balance of sweet, tart, and creamy, this Cherry Layer Cake with Cherry Cream Cheese Frosting is exactly what you need. Imagine moist layers of tender cake infused with the natural essence of cherries, topped with a velvety cream cheese frosting studded with juicy cherry pieces. This irresistible combination creates a luscious experience that will delight your taste buds and make any occasion feel extra special.
Why You’ll Love This Recipe
- Perfectly balanced flavors: The tartness of fresh cherries beautifully complements the rich cream cheese frosting for a harmonious taste.
- Moist, tender layers: The cake stays incredibly moist thanks to carefully chosen ingredients and simple baking techniques.
- Elegant presentation: This layer cake impresses visually with its vibrant cherry layers and smooth frosting, making it ideal for celebrations.
- Versatile dessert: Whether for a family gathering or a casual tea party, this cake fits seamlessly into any event.
- Easy to customize: The recipe adapts well to various dietary and ingredient preferences without compromising taste.
Ingredients You’ll Need
Each ingredient in this Cherry Layer Cake with Cherry Cream Cheese Frosting plays a crucial role in creating the perfect texture, sweetness, and vibrant color. From fresh cherries to creamy cheese, the simplicity of the list helps you focus on quality flavors.
- Fresh cherries: Adds natural tartness and juicy pockets of flavor that brighten the cake layers.
- All-purpose flour: The sturdy base that provides structure without weighing down the cake.
- Sugar: Balances tart cherries with just the right sweetness for a delightful dessert.
- Butter: Provides richness and moisture, contributing to a tender crumb.
- Cream cheese: Creates a smooth, tangy frosting that complements the cherry’s brightness.
- Eggs: Bind ingredients together and add stability to both cake and frosting.
- Baking powder: Gives the cake a light, airy rise without losing moisture.
- Vanilla extract: Enhances the overall flavor with a subtle aromatic touch.
- Lemon juice: Brightens the cherries and adds a fresh zing that keeps the frosting lively.
- Salt: Balances sweetness and enhances the ingredients’ natural flavors.
Variations for Cherry Layer Cake with Cherry Cream Cheese Frosting
This recipe is wonderfully versatile and invites personalization based on what’s in your pantry or your dietary preferences. You can easily switch things up while keeping the integrity of the cake’s flavor intact.
- Gluten-free option: Substitute all-purpose flour with a quality gluten-free blend to make it safe for celiac or gluten sensitive guests.
- Dairy-free adaptation: Use vegan butter and cream cheese alternatives to maintain creaminess without dairy.
- Chocolate cherry twist: Add cocoa powder to the batter for a chocolate layer that pairs perfectly with cherry frosting.
- Almond infusion: Incorporate almond extract into the cake for a nutty undertone that amplifies cherry flavor.
- Cherry jam swirl: Spread a thin layer of cherry jam between cake layers to intensify the fruity punch.

How to Make Cherry Layer Cake with Cherry Cream Cheese Frosting
Step 1: Prepare the Cherry Cake Layers
Begin by preheating your oven and preparing your cake pans with butter and flour or parchment. In a large bowl, cream together butter and sugar until light and fluffy. Beat in eggs one at a time, followed by vanilla extract. In a separate bowl, whisk together flour, baking powder, and salt. Alternate adding the dry ingredients and milk to the creamed mixture, starting and ending with dry. Fold in chopped fresh cherries gently to prevent color bleeding.
Step 2: Bake the Layers
Divide the batter evenly between the pans and bake until a toothpick inserted in the centers comes out clean, usually about 25 to 30 minutes. Remove from the oven and allow the cakes to cool completely in their pans before removing, ensuring layers stay intact and moist.
Step 3: Make the Cherry Cream Cheese Frosting
While the cake cools, beat softened cream cheese and butter until smooth and creamy. Gradually add powdered sugar while mixing, then stir in fresh cherry puree or finely chopped cherries along with a splash of lemon juice for brightness. Beat until the frosting is fluffy and spreadable.
Step 4: Assemble the Cake
Place one cake layer on a serving plate and spread an even layer of cherry cream cheese frosting on top. Repeat with the remaining layers and finish by covering the entire cake with the remaining frosting. Use the back of a spoon or an offset spatula to create smooth or textured patterns.
Step 5: Chill and Serve
For best results, refrigerate the cake for at least an hour before slicing. This helps the frosting set and the flavors to meld beautifully. Serve chilled or at room temperature depending on your preference.
Pro Tips for Making Cherry Layer Cake with Cherry Cream Cheese Frosting
- Use ripe cherries: Choose fresh, ripe cherries for the best flavor and moist texture.
- Don’t overmix batter: Mix just until ingredients combine to keep the cake tender and light.
- Chill frosting ingredients: Starting with cold cream cheese and butter helps prevent a runny frosting.
- Layer carefully: Use a serrated knife to level the cake layers evenly for a professional look.
- Store chilled: Keep the cake refrigerated to preserve the cream cheese frosting’s freshness and texture.
How to Serve Cherry Layer Cake with Cherry Cream Cheese Frosting
Garnishes
Enhance your presentation by topping the cake with whole cherries, edible flowers, or toasted almond flakes. These simple details add color, texture, and an extra touch of elegance to your dessert table.
Side Dishes
Pair this cake with light accompaniments like a scoop of vanilla bean ice cream or a bowl of fresh berries to complement the richness without overpowering the cherry flavor.
Creative Ways to Present
Try serving individual slices on pretty dessert plates with a drizzle of cherry syrup or a dollop of whipped cream for a cafe-style experience right at home. Alternatively, create mini versions as cupcakes decorated with a swirl of cherry cream cheese frosting for parties.
Make Ahead and Storage
Storing Leftovers
Keep leftover Cherry Layer Cake with Cherry Cream Cheese Frosting covered tightly in the refrigerator to maintain freshness for up to 3 days. Use a cake dome or airtight container to prevent drying out or absorbing other fridge odors.
Freezing
You can freeze individual cake layers or the whole assembled cake (without frosting) wrapped securely in plastic wrap and foil for up to 2 months. Thaw layers fully before frosting and assembling for best texture.
Reheating
This cake is best enjoyed chilled or at room temperature; avoid reheating as it may alter the cream cheese frosting’s texture. Simply let refrigerated slices rest at room temp for 15-20 minutes before serving to soften slightly.
FAQs
Can I use frozen cherries instead of fresh?
Yes, but be sure to thaw and drain frozen cherries well to avoid excess moisture that can make the batter too wet or cause color running in the frosting.
Is it necessary to refrigerate the cake?
Yes, because of the cream cheese frosting, it’s important to keep the cake chilled to prevent spoilage and maintain the frosting’s texture.
Can I make this cake vegan?
Absolutely. Substitute dairy and egg ingredients with vegan alternatives like plant-based butter, cream cheese, and flax eggs, adjusting the recipe as needed.
How long does this cake stay fresh?
When stored properly in the refrigerator, the cake stays fresh and delicious for up to 3 days.
Can I add alcohol to the cake or frosting?
Yes, a splash of kirsch or cherry liqueur can boost the cherry flavor beautifully—add it to the batter or cream cheese frosting for an adult twist.
Final Thoughts
This Cherry Layer Cake with Cherry Cream Cheese Frosting is truly a dessert gem that brings together juicy cherries, moist cake, and tangy-sweet frosting into one unforgettable treat. Whether you’re celebrating a special occasion or simply craving a slice of something delightful, this recipe promises to warm hearts and brighten taste buds. Give it a try—you might just make it your new favorite go-to dessert!
Related Posts
PrintCherry Layer Cake with Cherry Cream Cheese Frosting

A luscious Cherry Layer Cake featuring moist, tender cake layers infused with fresh cherries, topped with a velvety cherry cream cheese frosting. This perfectly balanced dessert combines sweet, tart, and creamy flavors, making it ideal for celebrations or casual gatherings.
- Prep Time: 20 minutes
- Cook Time: 30 minutes
- Total Time: 1 hour 10 minutes
- Yield: 12 servings
- Category: Dessert
- Method: Baking
- Cuisine: American
- Diet: Gluten Free (with flour substitution)
Ingredients
Cake Ingredients
- Fresh cherries (amount as per preference, roughly 1 to 1.5 cups, chopped)
- All-purpose flour – 2 ½ cups (or gluten-free flour blend as substitute)
- Sugar – 1 ¾ cups
- Butter – 1 cup (2 sticks), softened
- Eggs – 3 large
- Baking powder – 2 ½ teaspoons
- Vanilla extract – 1 ½ teaspoons
- Milk – 1 cup
- Lemon juice – 1 tablespoon
- Salt – ½ teaspoon
Frosting Ingredients
- Cream cheese – 1 (8 oz) package, softened
- Butter – ½ cup (1 stick), softened
- Powdered sugar – 3 to 4 cups
- Fresh cherries or cherry puree – ½ to ¾ cup, finely chopped or pureed
- Lemon juice – 1 teaspoon
Instructions
- Prepare the Cherry Cake Layers: Preheat the oven to 350°F (175°C) and grease and flour two 9-inch round cake pans or line them with parchment paper. In a large bowl, cream together the softened butter and sugar until light and fluffy. Beat in the eggs one at a time, then add vanilla extract. In a separate bowl, whisk together the flour, baking powder, and salt. Alternately add the dry ingredients and milk to the creamed mixture, beginning and ending with the dry ingredients. Fold in the chopped fresh cherries gently to prevent color bleeding.
- Bake the Layers: Divide the batter evenly between the prepared pans. Bake for 25 to 30 minutes, or until a toothpick inserted in the center comes out clean. Remove the cakes from the oven and allow them to cool completely in the pans to maintain moisture and layer integrity.
- Make the Cherry Cream Cheese Frosting: While the cakes cool, beat the softened cream cheese and butter together until smooth and creamy. Gradually add the powdered sugar while continuing to mix. Stir in the fresh cherry puree or finely chopped cherries along with a splash of lemon juice for brightness. Beat until the frosting is fluffy and spreadable.
- Assemble the Cake: Place one cake layer on a serving plate and spread an even layer of cherry cream cheese frosting on top. Repeat with the remaining layer(s), then cover the entire cake with the remaining frosting. Use a spatula or back of spoon to create a smooth or textured finish as desired.
- Chill and Serve: Refrigerate the assembled cake for at least one hour to allow the frosting to set and flavors to meld. Serve chilled or at room temperature based on preference.
Notes
- Use ripe, fresh cherries for the best flavor and moist texture.
- Do not overmix the batter to keep the cake tender and light.
- Start with cold cream cheese and butter to prevent runny frosting.
- Level cake layers evenly with a serrated knife for a professional look.
- Store the cake refrigerated to preserve freshness and frosting texture.
Nutrition
- Serving Size: 1 slice (1/12 of cake)
- Calories: 350 kcal
- Sugar: 28 g
- Sodium: 180 mg
- Fat: 20 g
- Saturated Fat: 12 g
- Unsaturated Fat: 6 g
- Trans Fat: 0 g
- Carbohydrates: 38 g
- Fiber: 1 g
- Protein: 4 g
- Cholesterol: 65 mg
Keywords: cherry cake, cream cheese frosting, layer cake, cherry dessert, moist cherry cake, gluten-free cherry cake, cherry cream cheese frosting, homemade cherry cake